Just updated your iPad Pro to iPadOS 17 and now your flash drive won’t show up in the Files app? Here are some troubleshooting tips to fix external storage access.
One of the conveniences of the iPad Pro is plugging in flash drives or SD cards to access additional storage. But after updating to iPadOS 17, you may suddenly find your connected flash drive no longer appears in the Files app. This prevents accessing the music, videos, photos, and documents stored on it.
While extremely annoying, an undetected flash drive after an operating system update is typically fixable through some simple troubleshooting. Let’s walk through how to get your external storage accessible in the Files app again after upgrading to iPadOS 17.
Why Won’t Flash Drive Show Up After iPadOS 17 Update?
There are a few potential reasons your flash drive may disappear from Files after updating:
- Bug introduced in iPadOS 17 causes access issues
- Outdated external storage drivers need updating
- Flash drive formatted incorrectly for iPadOS
- Corrupted data or incorrect ejection before update
Since major iPadOS updates often bring bugs, external storage glitches are common until fixed in later releases. Let’s resolve this!
Get Flash Drive Working Again in Files App
Try these troubleshooting steps to make your missing flash drive show up again:
1. Check the flash drive formatted properly as exFAT, APFS, etc.
Software updates can sometimes cause file system corruption on flash drives. This can make it difficult or impossible for the iPad to read and write to the flash drive.
In addition, iPads can only read and write to flash drives that are formatted in certain file formats, such as exFAT, FAT, and FAT32. If a flash drive is formatted in a different file format, such as NTFS, the iPad will not be able to recognize it.
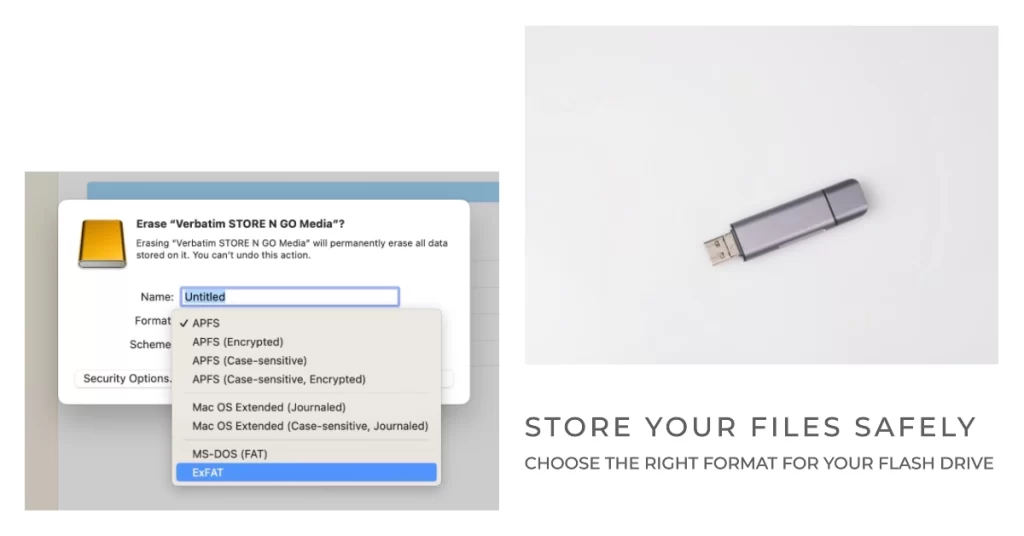
To rule these possibilities out, checking the flash drive format on your iPad is recommended.
To check if a flash drive is formatted properly for an iPad, you can connect the flash drive to your computer and open the Disk Utility app. In Disk Utility, select the flash drive and click the “Erase” tab. In the “Format” drop-down menu, select one of the following file formats:
- exFAT
- FAT
- FAT32
If the flash drive is already formatted in one of these file formats, you can skip this step.
Once you have selected a file format, click the “Erase” button to format the flash drive. Once the formatting process is complete, you can connect the flash drive to your iPad and try to access it.
If you are still having problems with your flash drive after checking the file format and formatting it properly, it is possible that the flash drive is corrupted or damaged. In this case, you may try the next applicable solutions.
2. Re-insert flash drive and reboot iPad
Re-inserting a flash drive and rebooting an iPad Pro can help deal with post-update problems with the flash drive not appearing in the Files app for a few reasons:
- It can clear any temporary glitches or errors that may be preventing the iPad from recognizing the flash drive.
- It can give the iPad a chance to reload its drivers and software, which may fix any problems that were caused by the update.
- It can also force the iPad to rescan for connected devices, which may make the flash drive appear in the Files app.
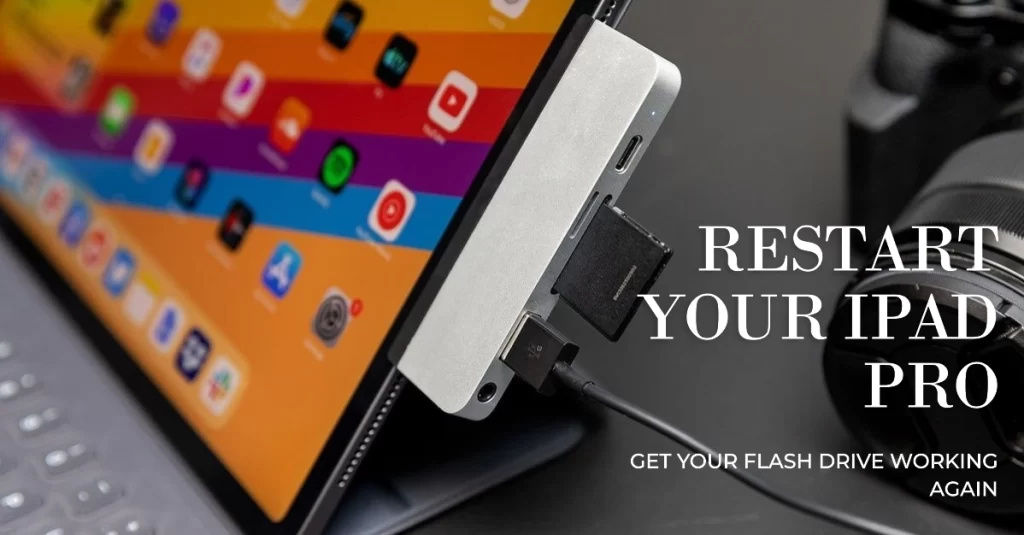
To re-insert a flash drive and reboot an iPad Pro, follow these steps:
- Disconnect the flash drive from the iPad.
- Restart the iPad.
- Once the iPad has restarted, reconnect the flash drive.
3. Try different USB port if using a hub
If the problem occurs while using a hub, try using a different USB port.
Using a different USB port on your iPad Pro can help deal with flash drive problems for a few reasons:
- It can eliminate the possibility of a problem with the USB port that you are currently using. If the flash drive works in a different USB port, then you know that the problem is with the original port.
- It can also help to clear any temporary glitches or errors that may be preventing the iPad from recognizing the flash drive. When you connect the flash drive to a different USB port, the iPad has to reload its drivers and software. This can help to fix any minor problems that may be preventing the flash drive from working.
To try using a different USB port on your iPad Pro, simply connect the flash drive to a different port. If the flash drive still does not work, you can try the other troubleshooting tips that I mentioned in my previous responses.
Other Suggestions
- Try using a different USB cable. It is possible that the USB cable that you are currently using is defective.
- Avoid connecting too many USB devices to your iPad Pro at the same time. This can overload the USB ports and cause problems.
- If you are using a powered USB hub, make sure that it is connected to a power source.
4. Update iPadOS to latest 17.x version if available
New updates can fix bugs that may be preventing the iPad from recognizing the flash drive.
Installing the latest OS version can update the iPad’s drivers and software, which may fix any problems that were caused by a previous update. It can also improve the overall performance and stability of the iPad, which may help to prevent flash drive problems from occurring in the first place.
- To check for new updates, go to Settings > General > Software Update.
If an update is available, follow the onscreen instructions to update your device. Just make sure that your phone is sufficiently charged and has stable Internet connection, preferably via Wi-Fi network.
5. Reset iPad to factory defaults as last resort
A factory reset on an iPad Pro erases all of the data and settings from the device and restores it to its original factory state. This can be useful for fixing a variety of problems, including storage problems like flash drives not showing up in the Files app.
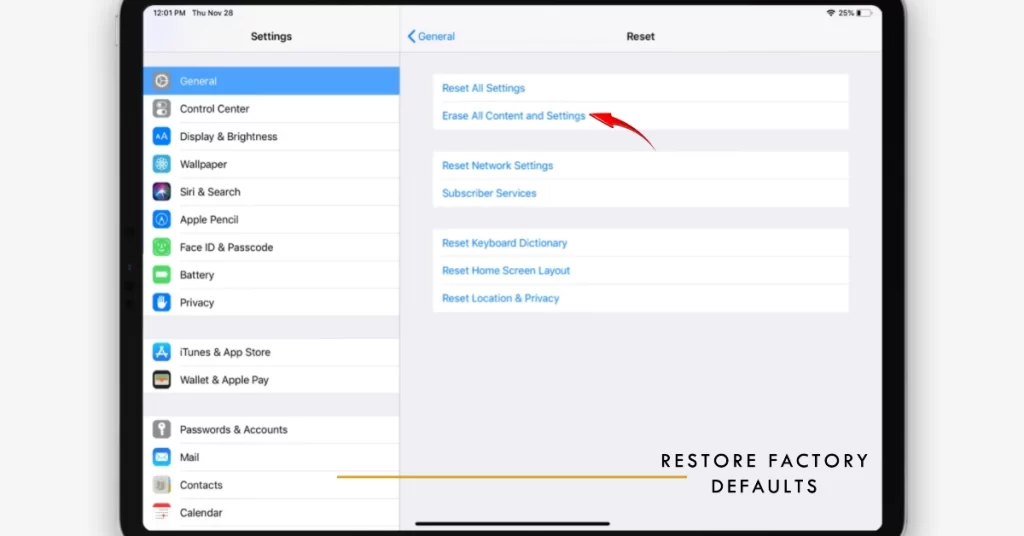
To perform a factory reset on an iPad Pro, follow these steps:
- Go to Settings > General > Transfer or Reset iPad.
- Tap Erase All Content and Settings.
- Enter your passcode or Face ID to confirm.
The factory reset process will take a few minutes to complete. Once the process is complete, your iPad Pro will restart and you will need to set it up as new.
It is important to note that a factory reset will erase all of the data on your iPad Pro, including any photos, videos, music, apps, and documents. Be sure to back up your data before performing a factory reset.
A factory reset can help to fix post-update storage problems like flash drives not showing up in the Files app by clearing all of the data and settings from the device and restoring it to its original factory state. This can fix any problems that were caused by the update, and it can also help to improve the overall performance and stability of the device.
If you have tried all of the other troubleshooting tips that I have mentioned and you are still having problems with your flash drive after performing a factory reset, then you should contact Apple Support for assistance.
Avoid Future External Storage Issues
Proactive precautions prevent many headaches. To avoid repeating this issue, follow these guidelines:
- Always properly eject flash drives before removing
- Maintain latest iPadOS version through updates
- Use reliable name brand flash drives with ample storage
- Format drives optimally for iPadOS compatibility
Generally, an external flash drive that vanishes in the Files app after an iPadOS update is aggravating but recoverable. But with concerted effort, your flash drive will reappear allowing you to again access its precious data and media. Reinsert the drive, check formatting, update iPadOS, and reset your iPad as needed.
Hope this helps!
